ReactJs - first steps
A gentle introduction to React for JavaScript developers using Vite.

I'm passionate about continuous learning, keeping myself up to date with latest changes in the IT field. My interest is in the areas of Web Development (JavaScript/TypeScript), Blockchain and GenAI (focusing on creating and deploying memory aware AI-powered RAG applications using LangGraph, LangFuse, QdrantDB and Neo4J). I welcome professional connections to explore new ideas and collaborations.
Today one cannot call oneself a JavaScript developer unless they know react. But still many JavaScript developers remain allusive when it comes to learning react or grasping the concepts that it puts forward or simply trying to make an initiative to understand what problems are react solving. In this article let’s demystify react from the point of view of a JavaScript developer (obvious pre-requisite - JavaScript knowledge )
What is ReactJS?
To define ReactJS
ReactJS is a widely used open-source JavaScript library (developed and maintained by Meta) which is used to build dynamic and interactive user interfaces for web based applications.
That’s all you need to know as a beginner about react. If you read react docs further with a goal of learning it, you’d get lost in documentation. Before we begin let’s understand some concepts.
Rendering
Rendering means painting the web page layout. Rending or creating the page layout is done by JavaScript sent by the server. If the rendering is done on the client’s machine (i.e. browser) it is called client side rendering; if it arrives pre-rendered, then it is called server side rendering. ReactJs follows the client side rendering approach and frameworks like NextJs follows server side rendering.
Build Tool
A JavaScript build tool automates and optimises the process of preparing JavaScript code for deployment. It simplifies the process, that’s it. There are many build tools like web pack, vite, etc. Vite (French word for "quick", pronounced as "veet") is a build tool we will be using for this documentation so that we can quickly get things done and move forward with our ReactJs learning journey.
Installing Vite
We can install ReactJs via Vite using NPM commands.
npm create vite@latest . // install vite in the current directory (. means current directory)
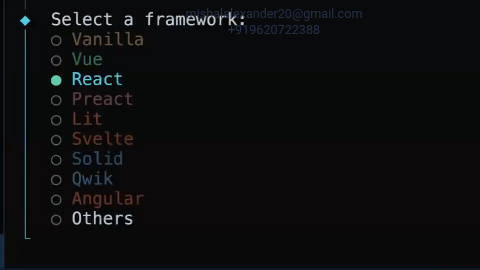
it will ask you to select a framework. Let’s pick - React…
we will be using JavaScript for this tryout…
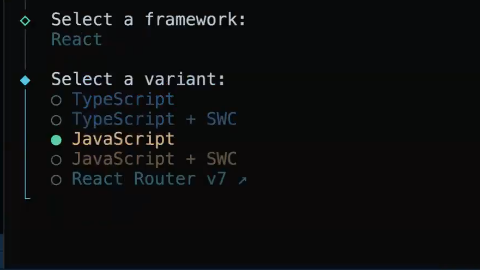
after selection, it will create a scaffolding project (i.e. a demo project) for us and ask us to run ‘npm install’ command and ‘npm run dev‘ command (let’s run this second command later) …
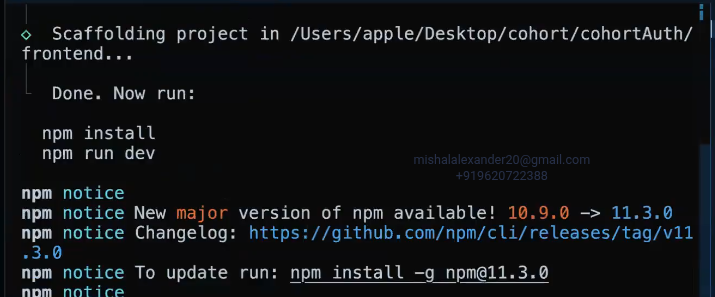
Once done the installation part is completed.
Trimming the scaffolding project
The scaffolding folder structure looks something like this:
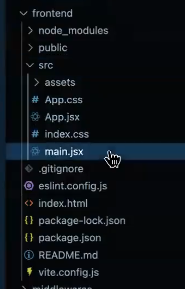
let’s open the ‘main.jsx’ (‘jsx’ file - JavaScript file that renders an HTML page)
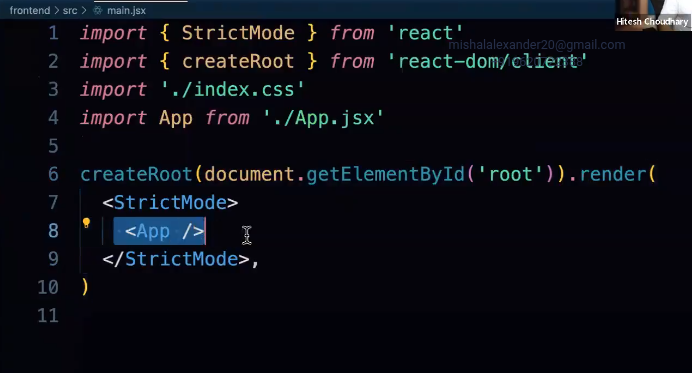
Ignore the function calls and what it does for now; as JavaScript developer, you can probably guess that this basically identifies the root element and renders a vague HTML element called ‘<App />’ which comes from ‘./App.jsx’. Let’s open that file and see what it has…
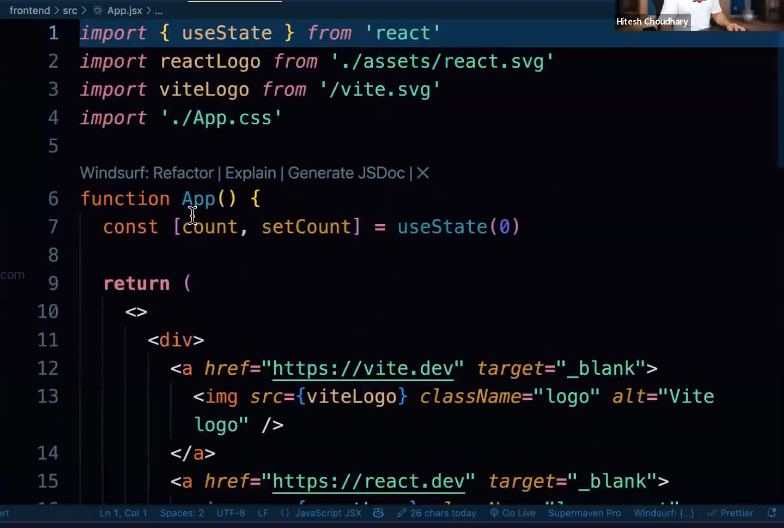
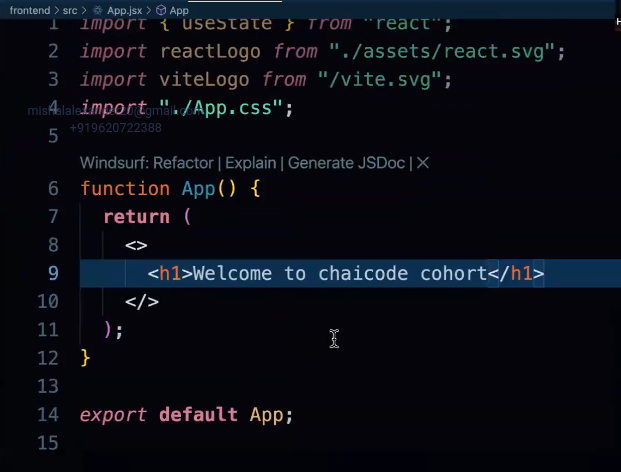
It basically has a function ‘App()’ which returns something that looks like an HTML. But it looks complex for now. Let’s simply remove everything inside the ‘App()’ function and write a simple HTML code and see if it works…
now let’s run ‘npm run dev’ and go to ‘http://localhost:5173’ see how it looks like:
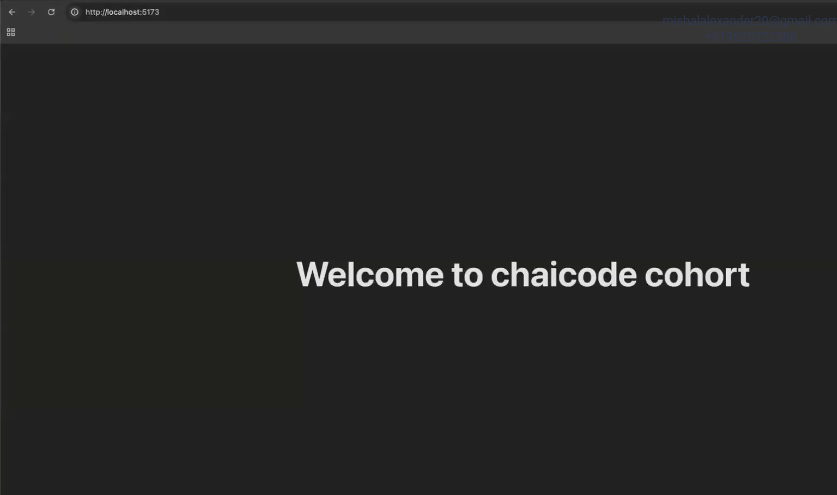
Okay so now we have a rough idea what it does. Whatever HTML like code you write inside the ‘App()’ function gets pushed in the main.jsx which renders it on the HTML page.
The format of the function looks like this:
// jsx function format
function <function-name>() {
    return(
        <div>
            <h1>Welcome to ReactJs</h1>
        </div>
    )
}
‘useState()’ Method in ReactJs
What is ‘useState()’ method? It is a simple method which helps us to pass & change values to these functions. Syntax:
const [<variable>, <functionToSetValueToTheVariable>] = useState(<defaultValue>);
Let’s see an implementation of ‘useState()’ in the following example:
function createName(){
    const [name, setName] = useState("");
    return(
        <div>
            <h1>Welcome to ReactJs {name}</h1>
            <button onClick={() => setName("Piyush")}>Click me </button>
        </div>
    )
}

export default createName;
That’s all there is! Wherever ‘name’ is called, the value of ‘name’ at that time is set there. Whenever we want to modify it, simply use the ‘setName()’ callback function to do so. Whatever we set inside the ‘useState()’ will be the default value of the ‘name’ variable.
Components in ReactJs
Lets not complicate ourselves by delving into it’s implementation or anythings. Components refers to HTML blocks created using React methods written in jsx files. That’s it. We have already seen how a component looks like in the above code examples. Yes! Let me write it below just in case again for reference:
function createName(){
    const [name, setName] = useState("");
    return(
        <div>
            <h1>Welcome to ReactJs {name}</h1>
            <button onClick={() => setName("Piyush")}>Click me </button>
        </div>
    )
}

export default createName;
Component files are stored in ‘src/components’ folder. We can use the component files wherever we want by simply importing them and passing the exported function within self closing angular brackets (i.e. ‘</>’ ). Let’s see an example:
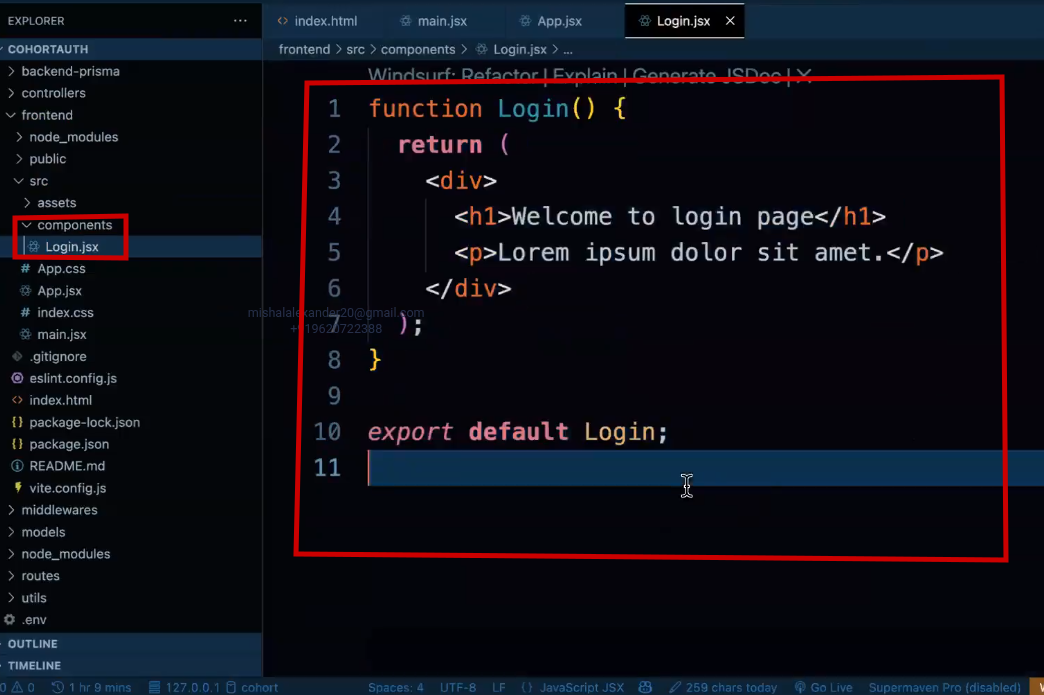
We have got a component ‘Login’ which we have placed inside ‘src/components’ folder. Let’s import it in the App.jsx file which Vite gave us…
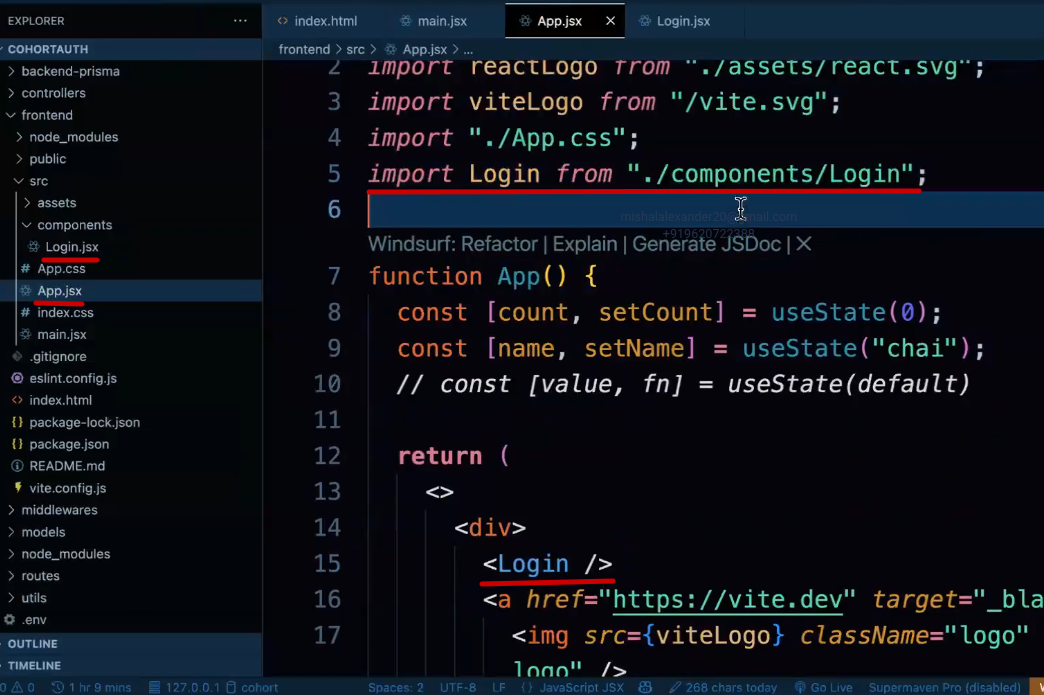
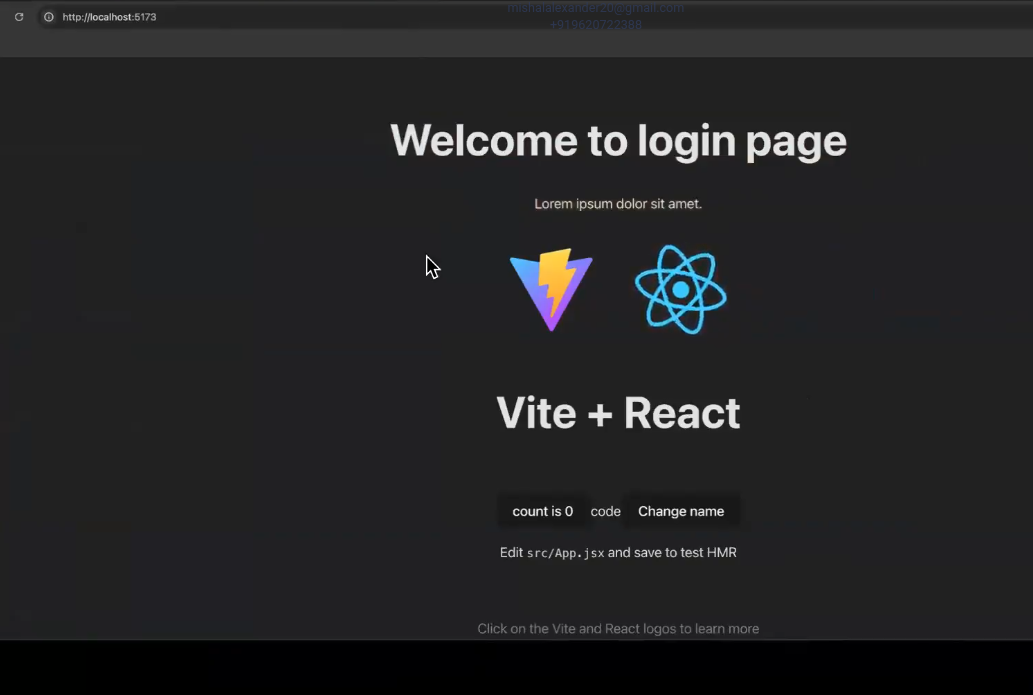
and see how it turned out. As expected.
That’s all there is to know about components as of now.
React-Router
React-router is a package which allows us to navigate to different HTML pages.
First install it with the npm command
npm install react-router
Then we need to import ‘BrowserRouter, Routes, Route’ from ‘react-router’ in the ‘main.jsx’ file and then wrap the component we need to use within the imported items like this:
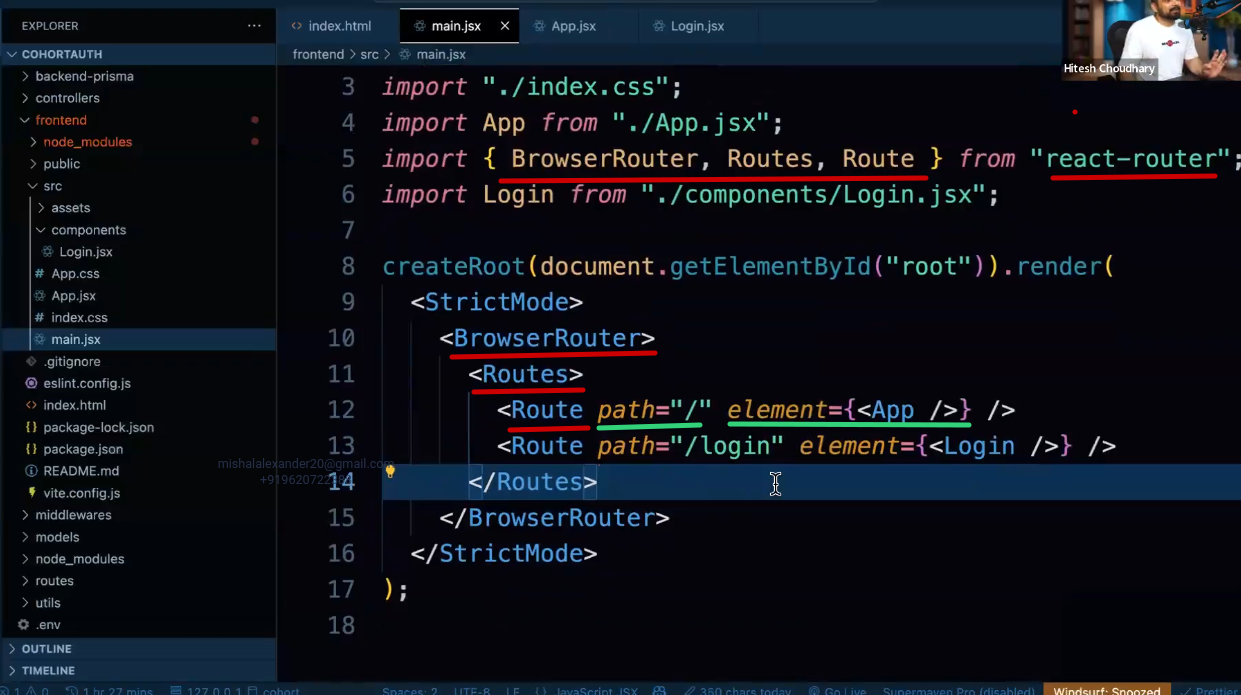
‘The ‘path’ property within each ‘Route’ within ‘Routes’ dictates which element needs to be loaded when user navigates to that path. For instance, in the above example, when we navigate to ‘localhost/login’, react-router will render the ‘Login’ component we saw above. We can add as many ‘Route’ as we want. We can also nest these if required.
‘class’ becomes ‘className’
Inside a jsx file, we cannot use ‘class’ to denote a class of an HTML element. When the component renders on the web page, ‘class’ is converted to ‘className’ before doing so due to internal logic. Which is why react chose to use ‘className’. Also to add, ‘class’ is a keyword which is reserved to create class files. Therefore we need to use ‘className’ when we want to access ‘class’ of an HTML element.
Conditional Rendering of Components
The concept is not as heavy as it sounds. In fact, it is much lighter. It is rendering of a component based on a condition and how is that condition determined? in an ‘if-else’ loop. Let’s see an example:
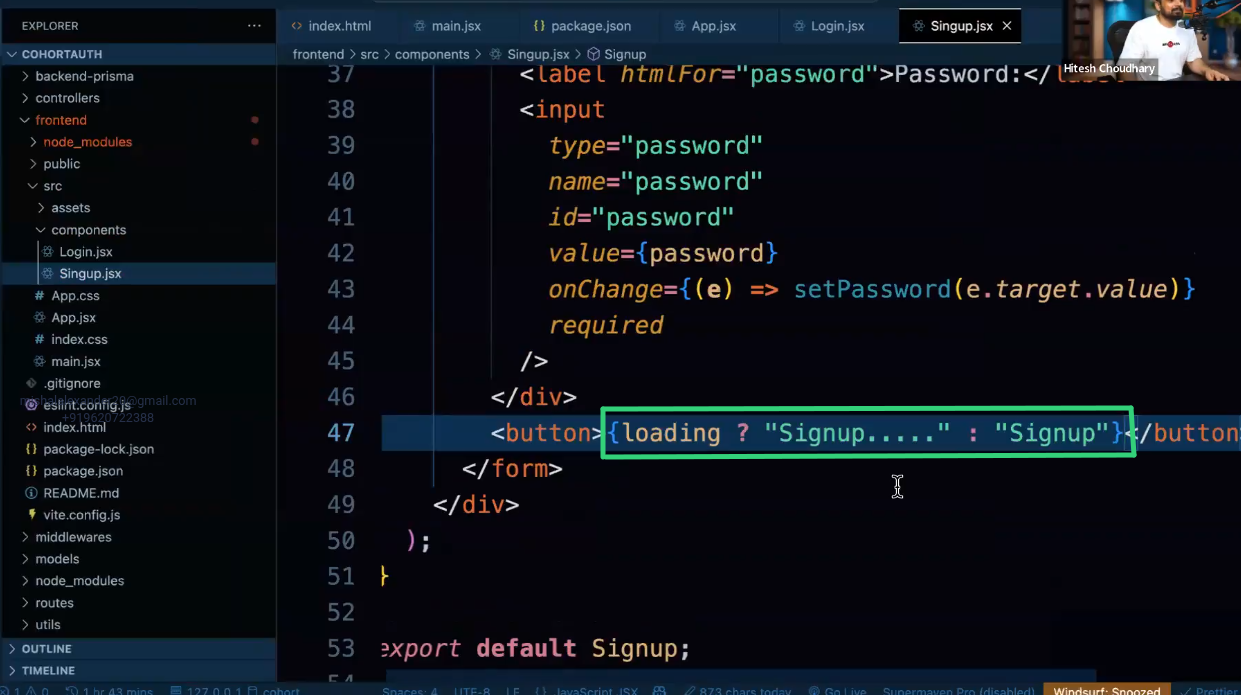
If the condition or variable in this case returned true, then render “Signup…” and if not, then render “Signup“.
Conclusion
We have covered a lot of topics enough to overwhelm. We used Vite to install React, build some components, and used react-router to navigate to different pages. This is a good starting point.
Reference


